RB Robotics
|
|
|
RB Robotics |
|
|
||
|
|
Parts List
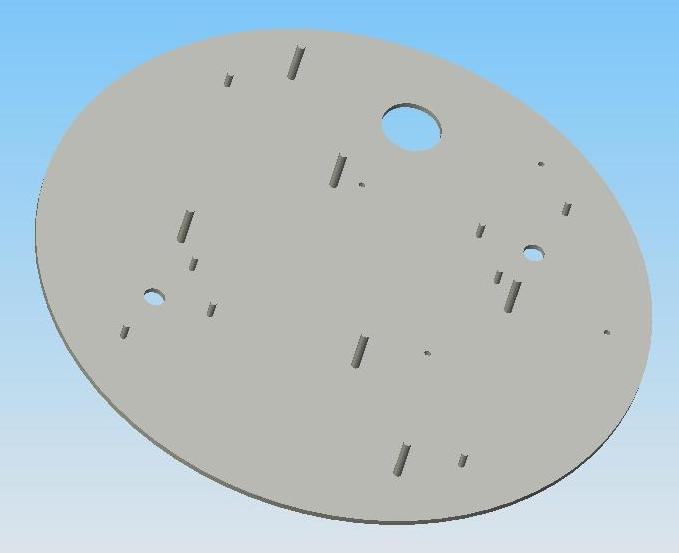
Take the Base Plate and place the side with 6 long threaded standoffs facing up.
( ) Place (2) #10 washers on each of the longer threaded standoffs (12 total) 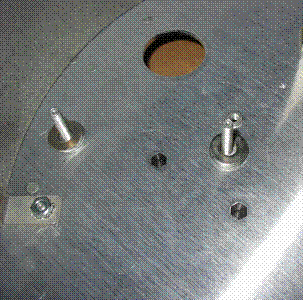
( ) Place a motorized transmission assembly on the long threaded standoff as shown (the three standoffs on each half of the Base Plate should go through all three of the rubber-grommet holes in the transmission assembly, and the wires from the motors will be facing away from the center.)
( ) Place a second motorized transmission assembly on the long threaded standoff as shown
( ) Install #10 lock washer on each stud (6 total) (illustration) ( ) Place a 10-32 nut on each long standoff to secure the transmissions in place. (6 total) It is difficult to secure the inner nut. If you find you have great difficulty, disregard, as it is not needed and does not affect operation. ( ) Install the lower battery bracket (illustration) ( ) Install (4) #6 Keps nuts ( ) Install (2) 7/16 lock washers onto the (2) 7/16 bolts (illustration) ( ) Insert the (2) bolts through the base plate (illustration) ( ) Thread the (2) caster extensions on to the 7/16 bolts (illustration) ( ) Install (2) casters onto the caster extensions (illustration) 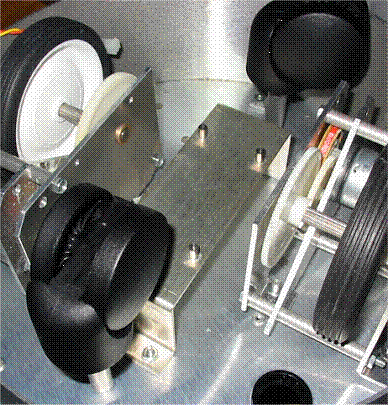
|
|
|
Copyright © 2005 RB Robotics | |